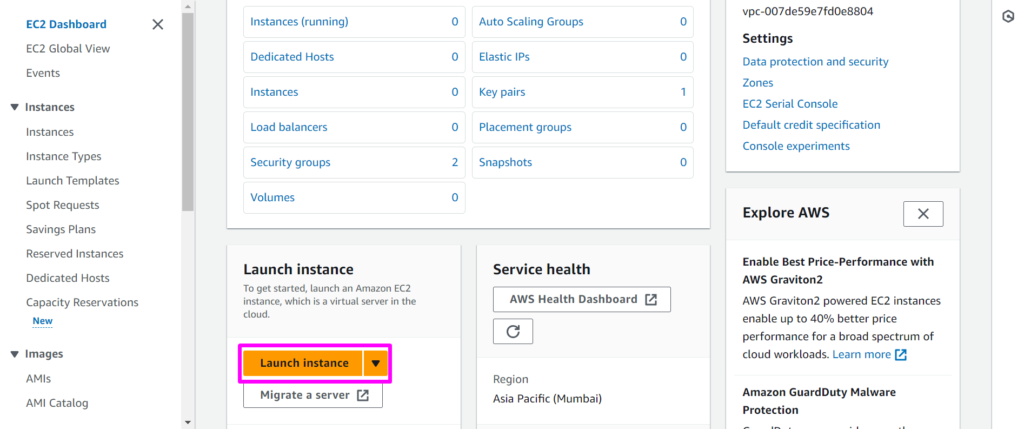
Step 1: We need to go to aws management console with your credentials.
After Go To EC2 Dashboard,you will see the same page
Pre-requisites
1: Install any RDP client tool in your Local System.
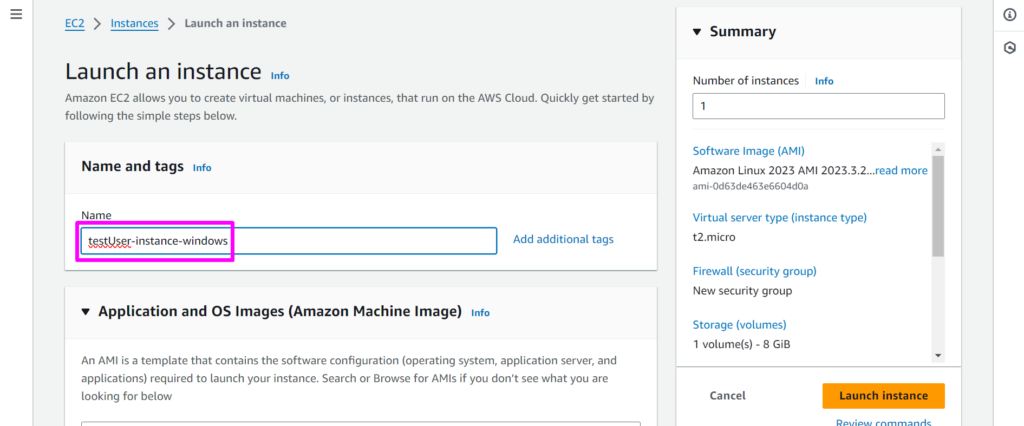
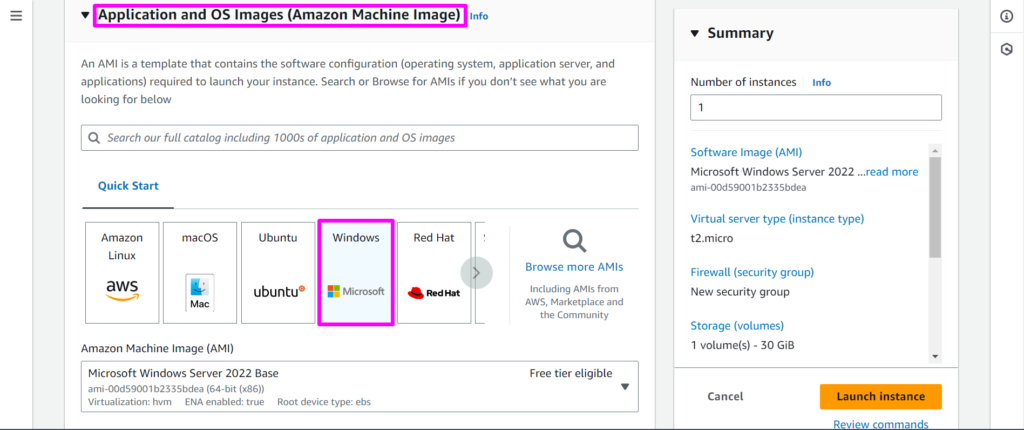
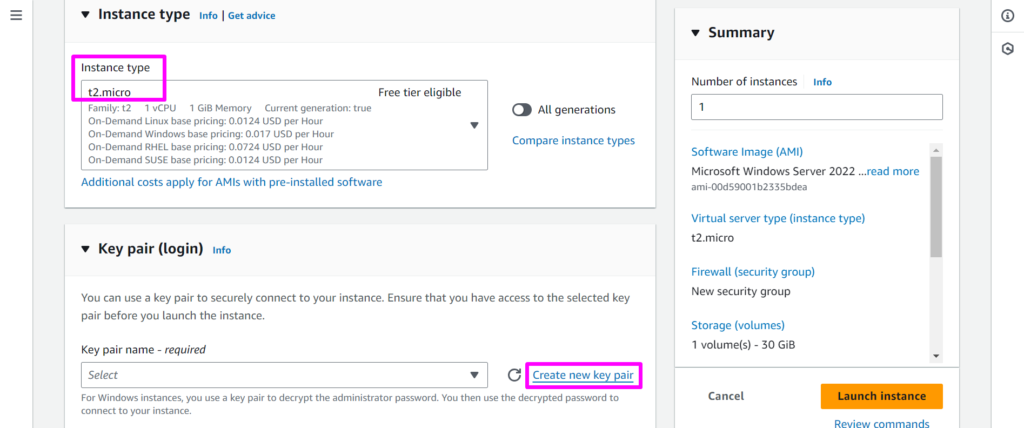
Step 2: Provide a name for your EC2 instance, select Windows operating
system, choose an instance type, and click on Create New Key Pair (or use an
existing key pair if available).
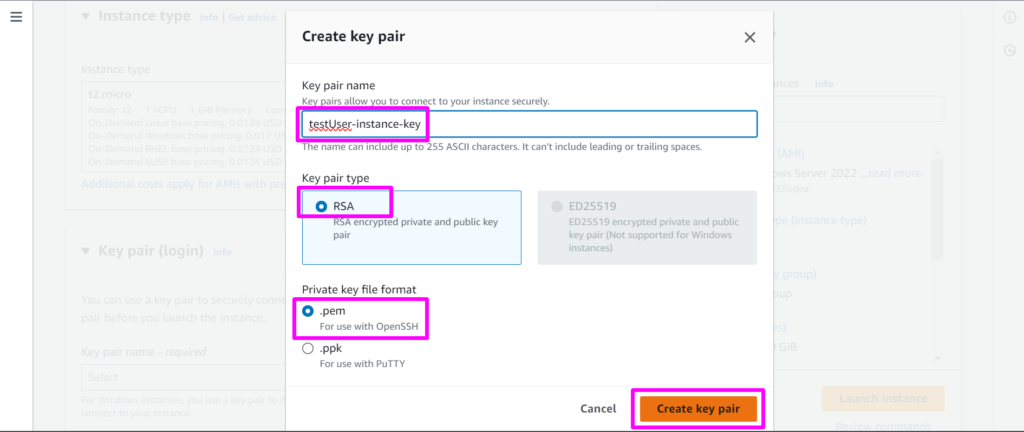
Step 3: Assign a name to your key pair, choose the encryption type and file
format, and then click on the Create Key Pair button
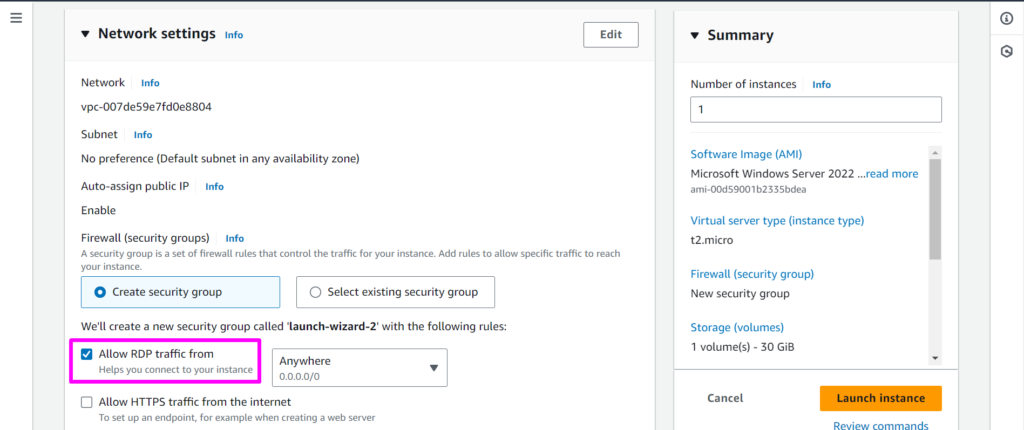
Step 4: Navigate to Network Settings, Allow RDP traffic in the firewall settings,
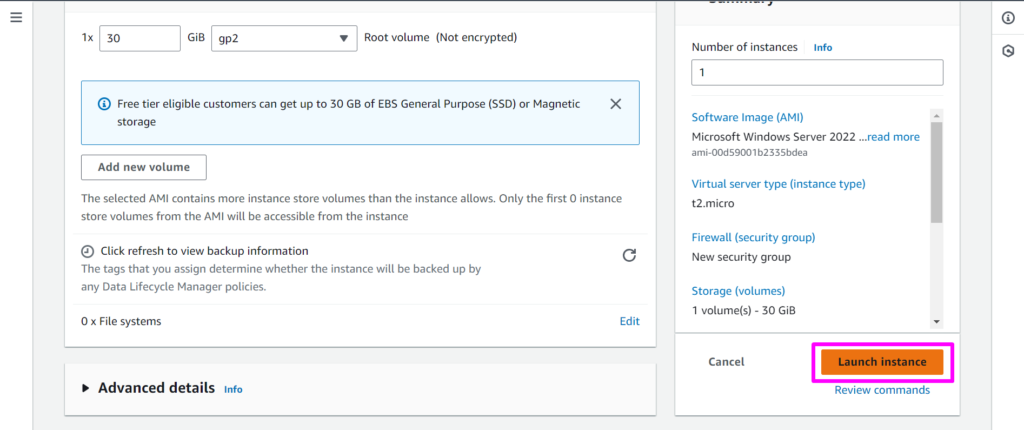
scroll to the bottom to review disk configurations, and then click on Launch
Instance.
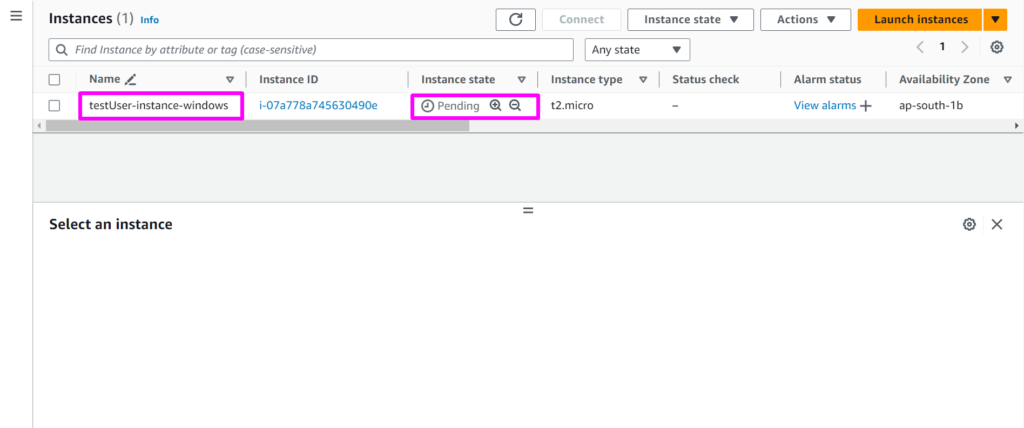
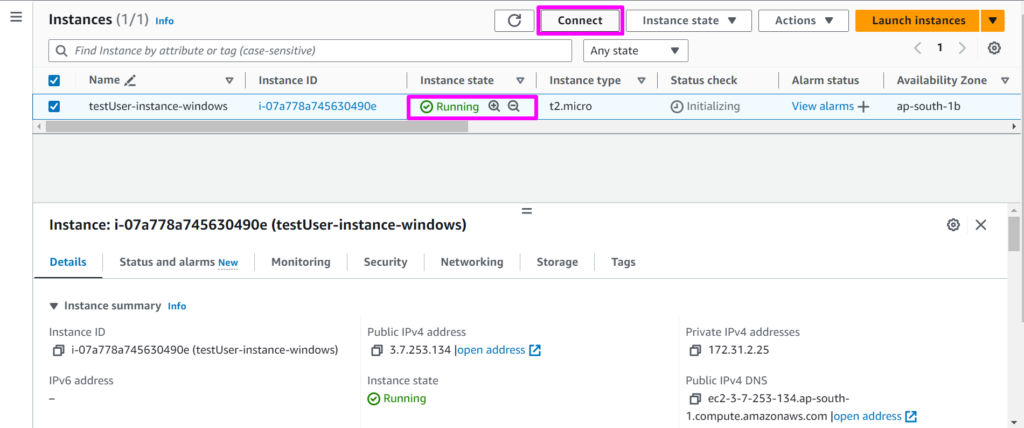
Step 5: Patience, and wait for your instance to reach the running state. Once
ready, select your Instance, click on Connect and proceed to the RDP client
option.
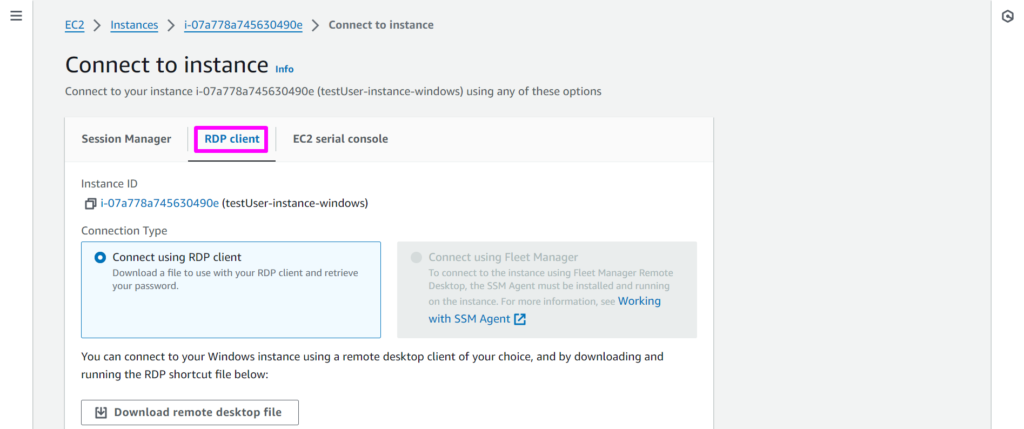
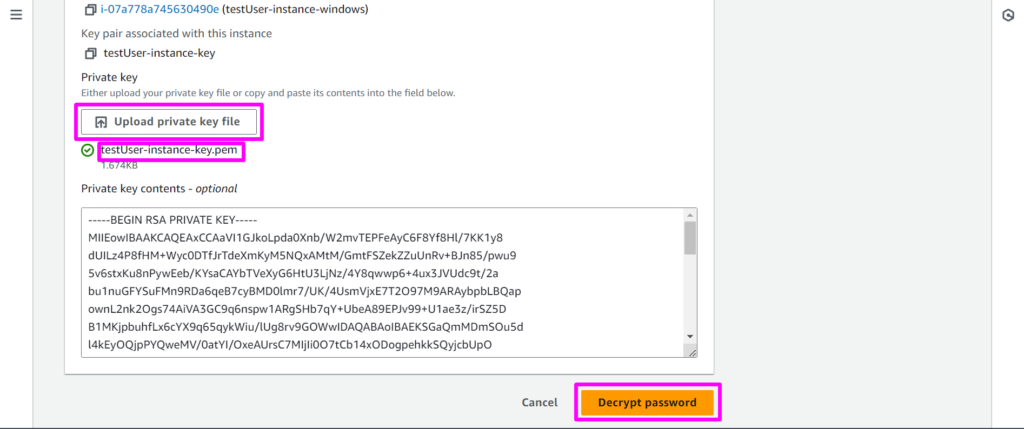
Step 6: Scroll to the bottom, click on the Get Password button, upload the
downloaded key file, and press the Decrypt Password button.
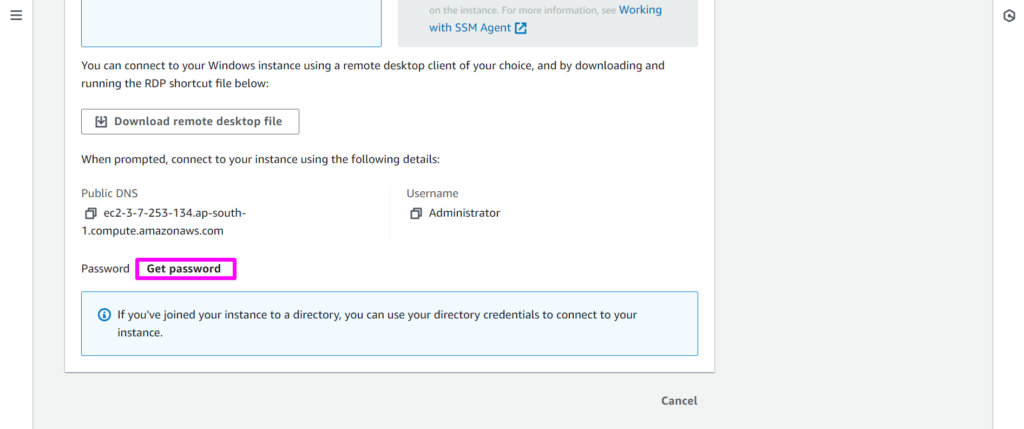
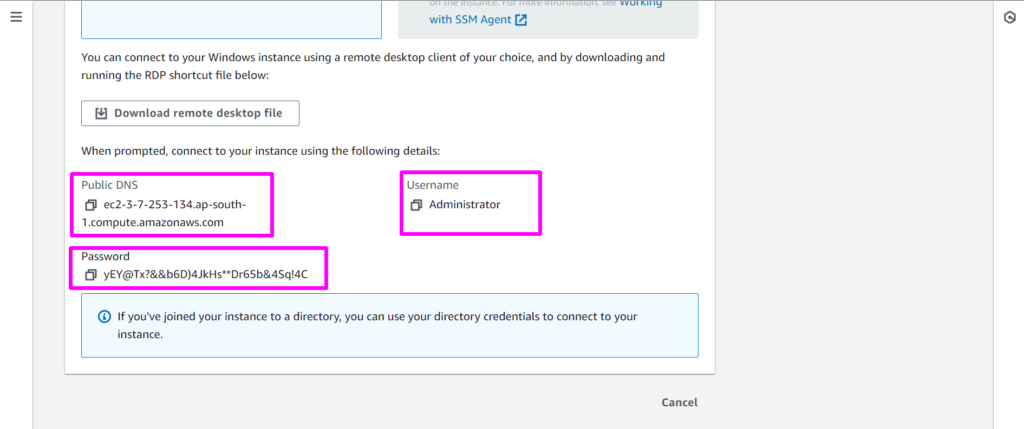
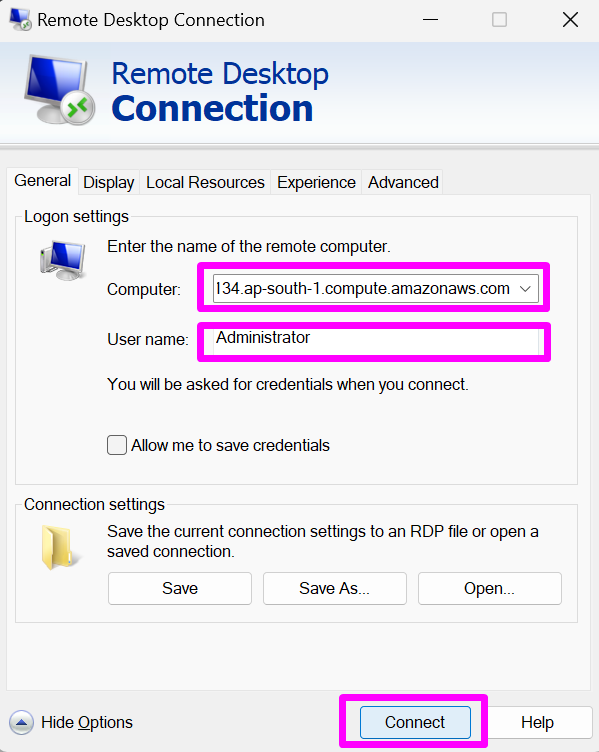
Step 7: Retrieve all the required connection details. Open your local RDP Client
tool and input the details to connect to your Windows machine.

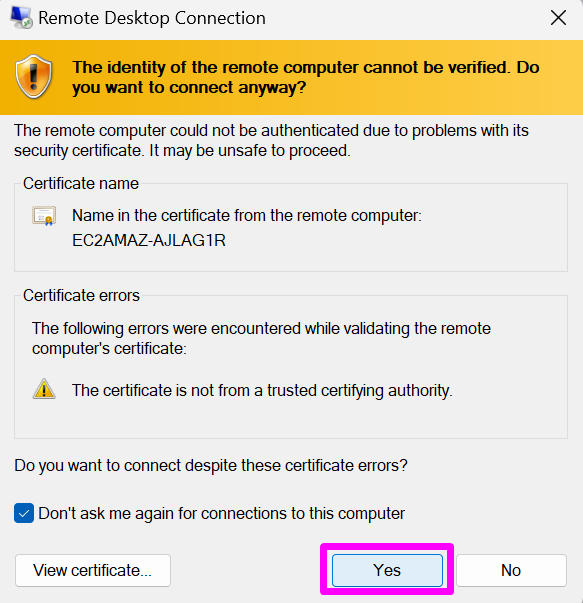
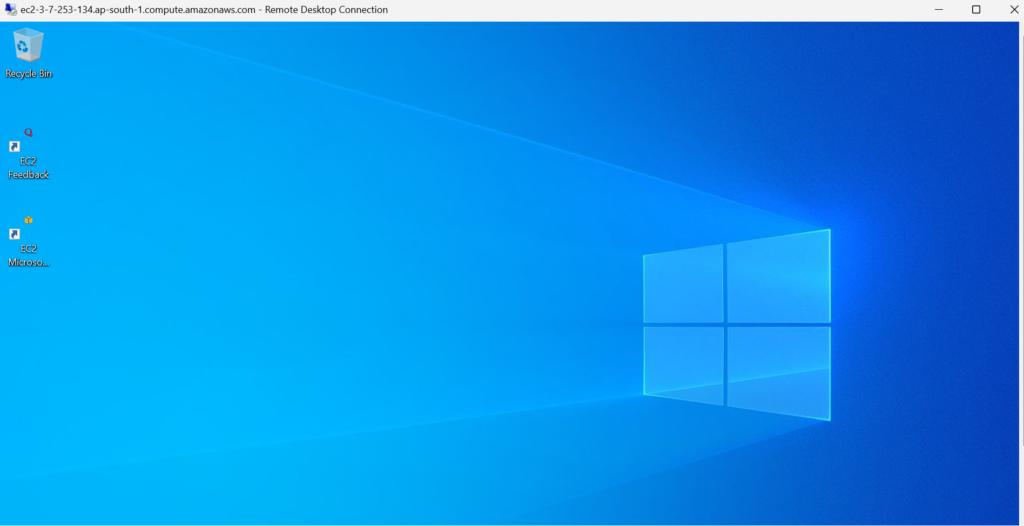
Step 8: Congratulations! You are now successfully connected to the Windows
EC2 instance, marking the completion of our hands-on experience.