AWS CloudFormation is a service that helps you model and set up your AWS resources using code. To write a CloudFormation template, you’ll typically use either JSON or YAML to define the infrastructure you want to create or manage.
Here’s a step-by-step guide to writing a CloudFormation template:
1. Basic Structure
A CloudFormation template consists of the following sections:
- AWSTemplateFormatVersion (optional): Template version identifier.
- Description (optional): A description of your template.
- Metadata (optional): Additional data about the template.
- Parameters (optional): Input values to customize the template.
- Mappings (optional): Fixed variables for conditional logic.
- Conditions (optional): Logic for creating resources based on certain conditions.
- Resources (required): The AWS resources to be created or managed.
- Outputs (optional): Values you want to output after creating the stack
2. Sample Template in YAML
Here’s an example of a CloudFormation template to create an Amazon S3 bucket:
yamlCopy codeAWSTemplateFormatVersion: "2010-09-09"
Description: A simple CloudFormation template to create an S3 bucket.

Resources:
  MyS3Bucket:
    Type: AWS::S3::Bucket
    Properties:
      BucketName: my-unique-bucket-name
      AccessControl: PublicRead
3. Key Concepts
- Resources: Every resource has a logical ID, a type (e.g.,
AWS::S3::Bucket), and properties specific to that resource. - Parameters: Allow customization without modifying the template.yamlCopy code
Parameters: BucketName: Type: String Description: The name of the S3 bucket. Resources: MyS3Bucket: Type: AWS::S3::Bucket Properties: BucketName: !Ref BucketName - Outputs: Provide outputs like resource IDs or URLs.yamlCopy code
Outputs: BucketName: Value: !Ref MyS3Bucket Description: The name of the S3 bucket created.
4. Best Practices
- Use YAML: It’s more readable than JSON and widely used for CloudFormation templates.
- Validation: Use AWS CloudFormation Designer or the AWS CLI (
aws cloudformation validate-template) to validate your templates. - Organize Resources: Group related resources logically for better readability.
- Modular Templates: Break large templates into smaller stacks using nested stacks.
- Use Parameters: To make templates reusable and dynamic
5. Deploying a Template
- Save your template as a
.yamlor.jsonfile. - Use the AWS Management Console, AWS CLI, or AWS SDKs to deploy the template.
Using AWS CLI:
bashCopy codeaws cloudformation create-stack --stack-name my-stack-name --template-body file://template.yaml
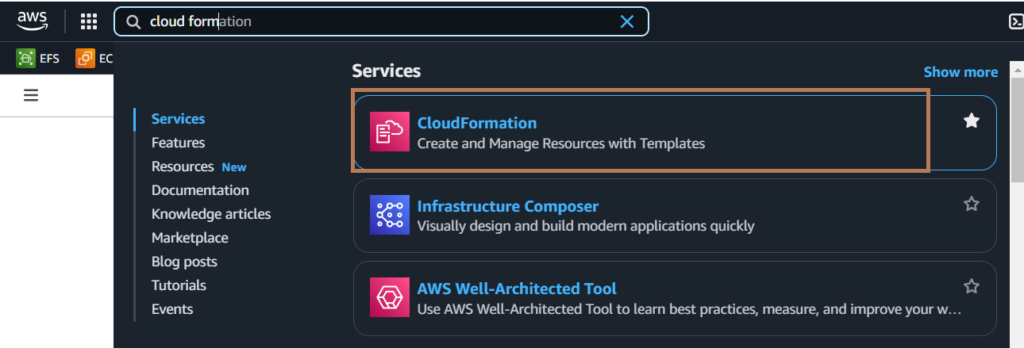
1.First Go To AWS Management Console and Search Cloud Formation.
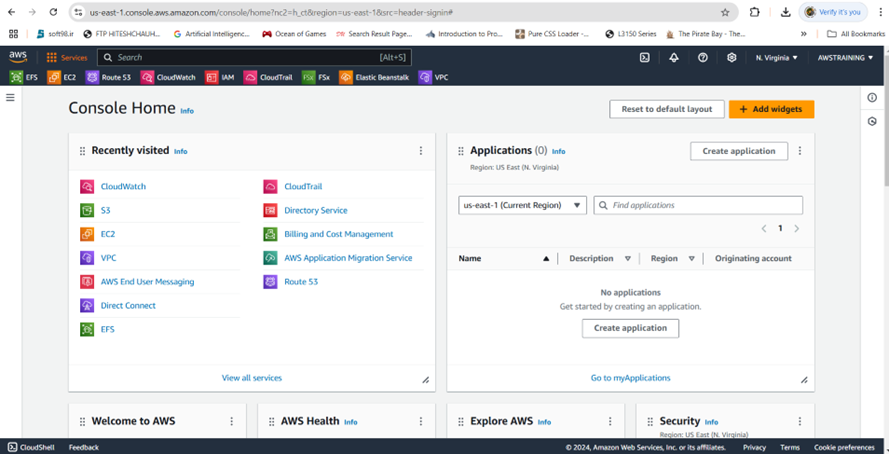
Click On Cloud Formation
After Click the cloud formation You will see this screen.
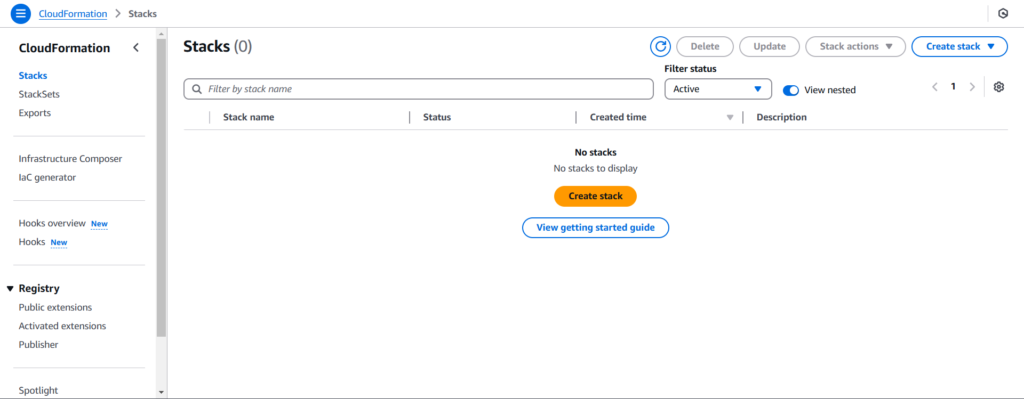
Then Click Create Stack.
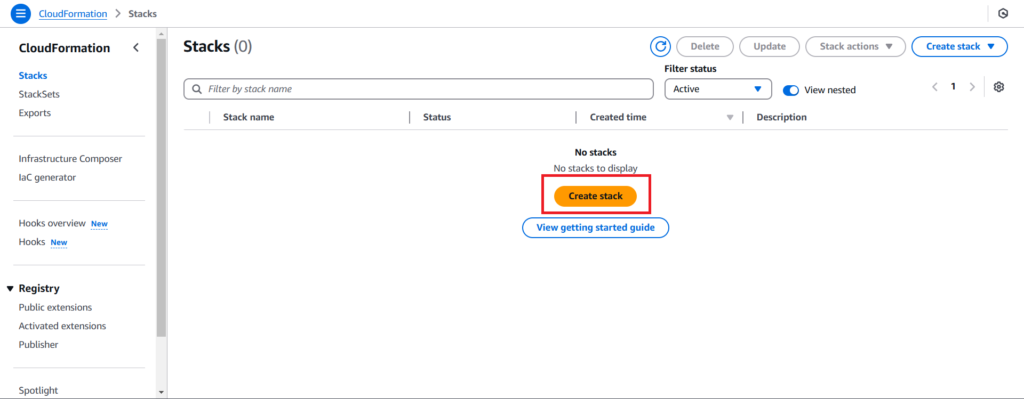
After Click The Create Stack.you will see like this.
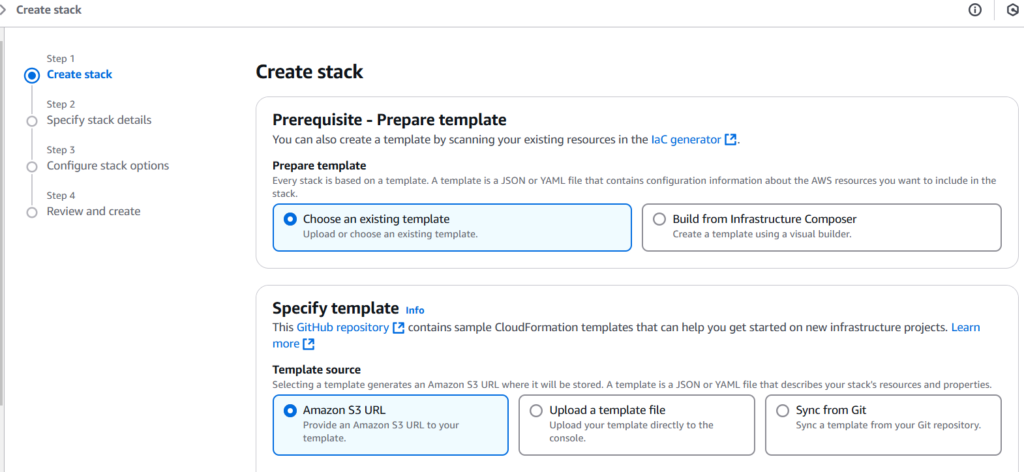
Now This Specify Templates There is three option.
1.Amazon S3 Url
If your code is already uploaded in s3 bucket so you can upload via s3 bucket.
2.Upload A Template File.
Hard coded written in visual code so you can upload the code .yml format.
But I want to suggest the upload the template file.
If you dont know how to written the code this below links you will help.
https://docs.aws.amazon.com/AWSCloudFormation/latest/UserGuide/aws-resource-ec2-instance.html
In this you can write a code in two way.
1.json format
2.yaml format
In this documents you will get the all the information.this is the basic example of creation of code and what is use properties.
Ec2Instance:
  Type: AWS::EC2::Instance
  Properties:
    ImageId:
      Fn::FindInMap:
        - "RegionMap"
        - Ref: "AWS::Region"
        - "AMI"
    KeyName:
      Ref: "KeyName"
    NetworkInterfaces:
      - AssociatePublicIpAddress: "true"
        DeviceIndex: "0"
        GroupSet:
          - Ref: "myVPCEC2SecurityGroup"
        SubnetId:
          Ref: "PublicSubnet"
Let’s see with the example with .yaml file
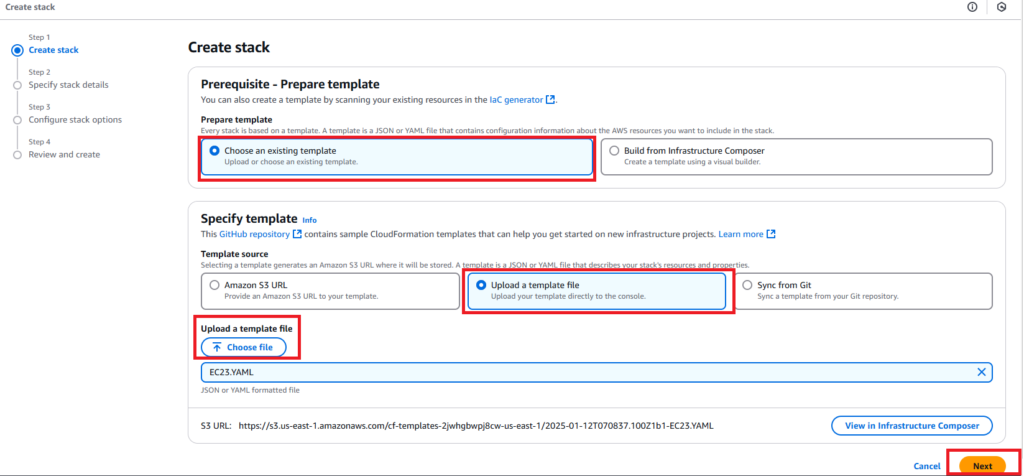
Then Click Next
After Click Next Button You Need to specify the stack details.
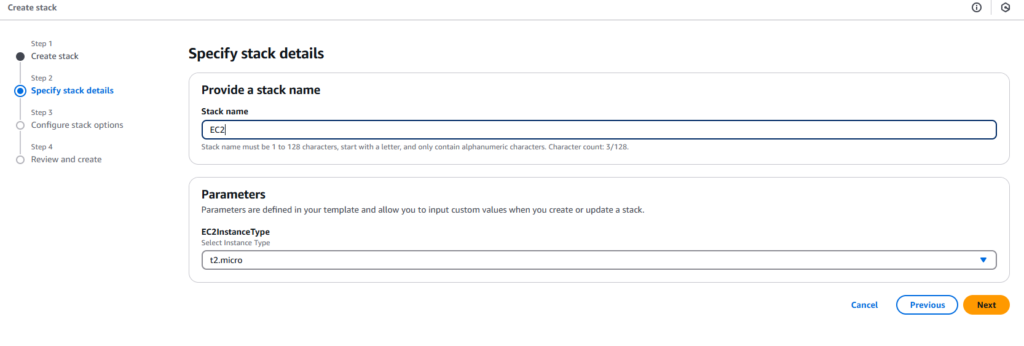
Then Click Next
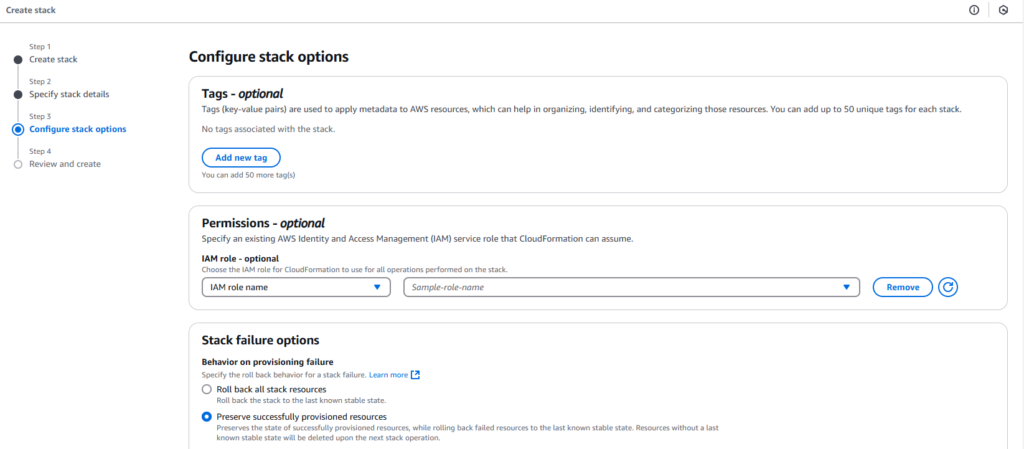
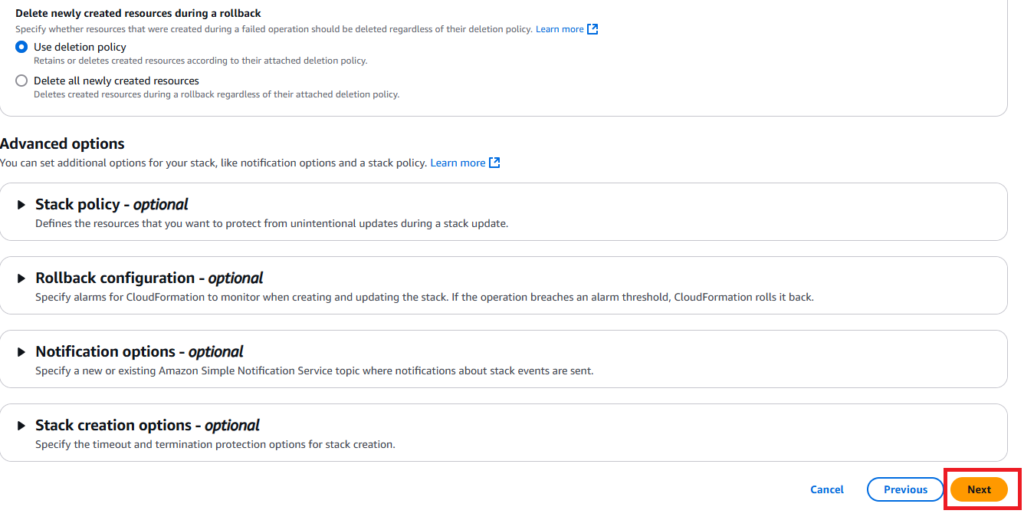
Then Click Next.
You will see the review and create.review the all information you specified in cloud stack.
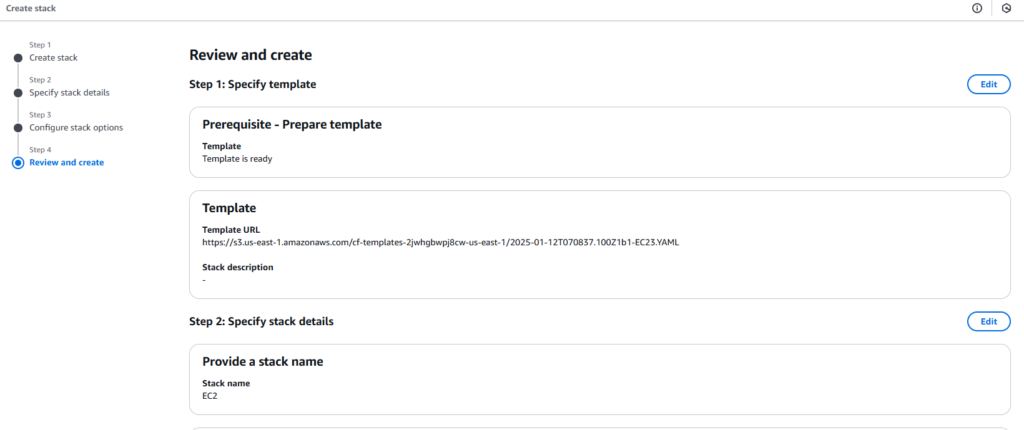
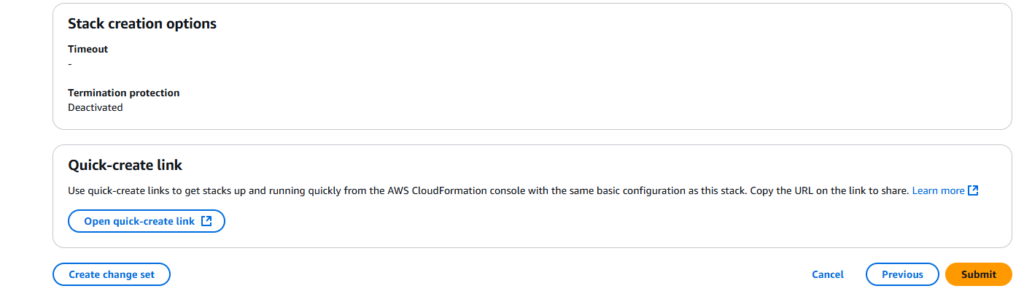
Then Submit the Code.
After Submit the code you will see the create in progress.
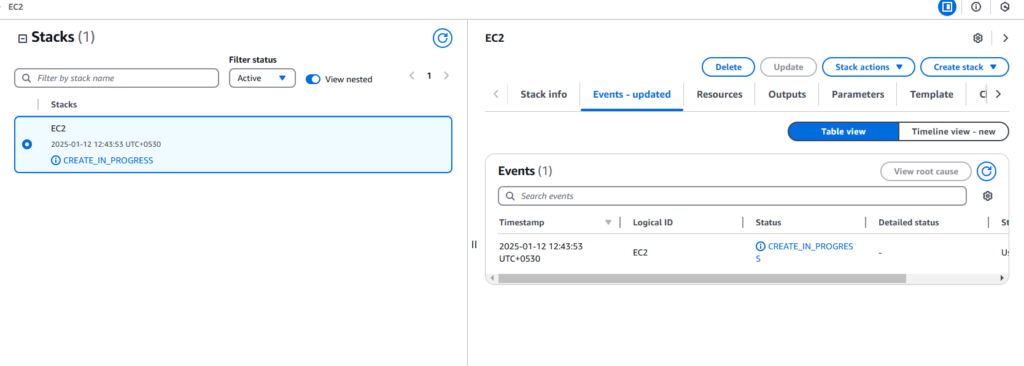
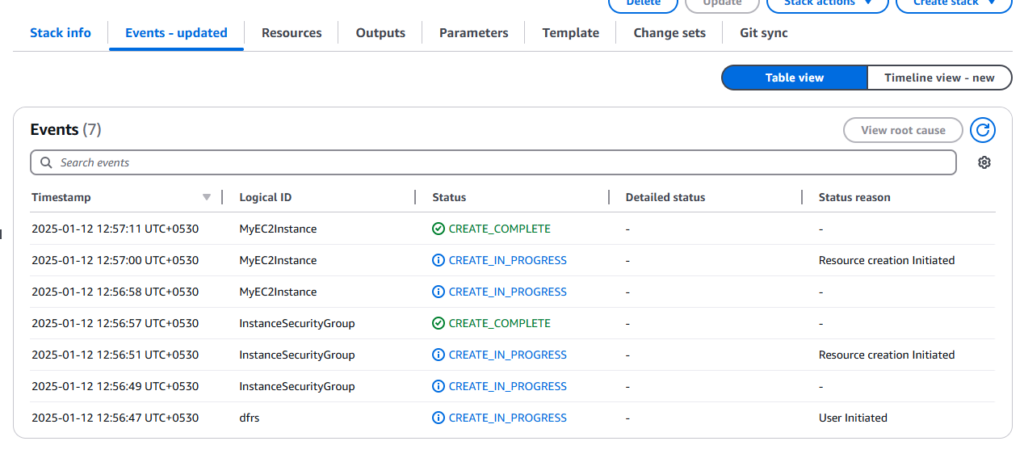
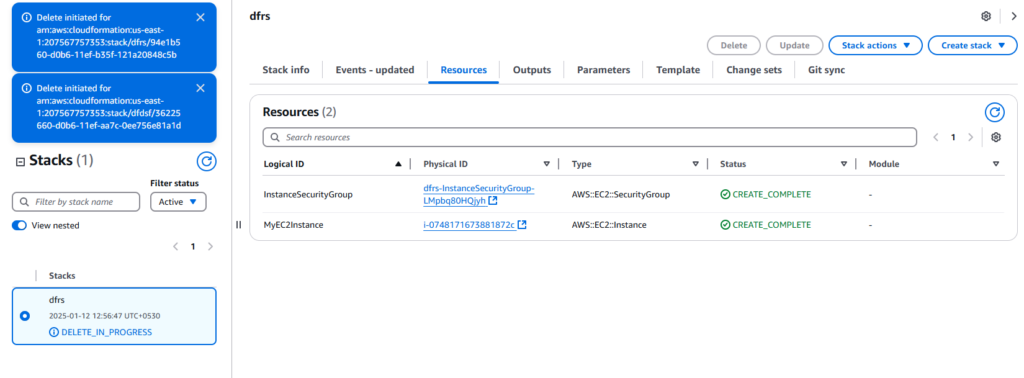
Click the resources You will see the progress of each and every paramater.
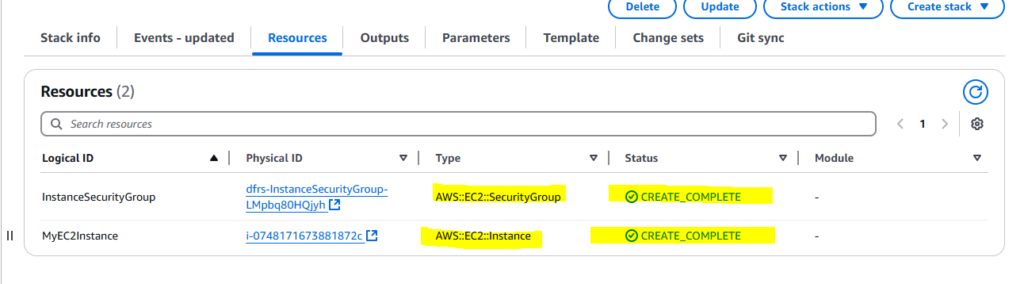
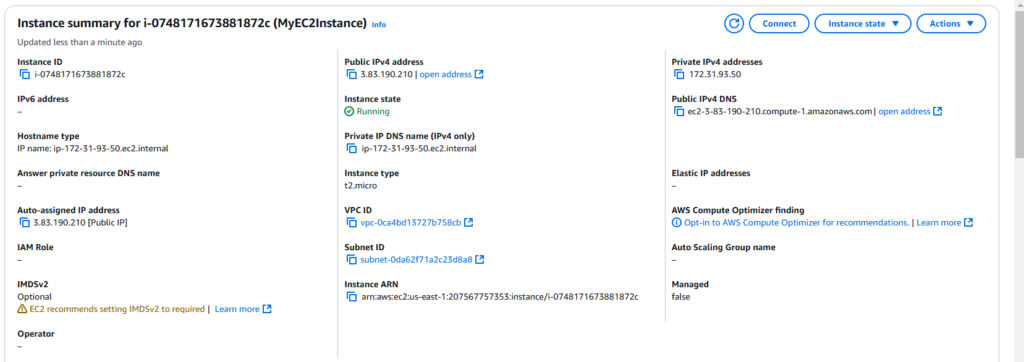
After Stack Complete you will see the below one instance has been created by script or you can say .yaml through cloud formation.

After Work is Done.you can delete your stack.
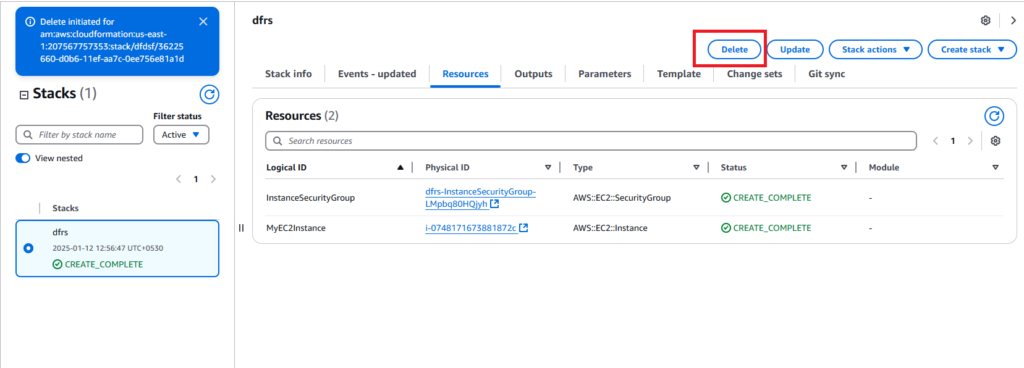
Note:You delete the stack all infrastructure has removed you created by cloud formation stack.
That’s it
This is the full code.you can use this code create your own infrastructure.
AWSTemplateFormatVersion: "2010-09-09"
Description: CloudFormation template to create an EC2 instance.

Parameters:
  InstanceType:
    Type: String
    Default: t2.micro
    Description: Type of EC2 instance to launch.
    AllowedValues:
      - t2.micro
      - t2.small
      - t2.medium
    ConstraintDescription: Must be a valid EC2 instance type.

  KeyName:
    Type: AWS::EC2::KeyPair::KeyName
    Description: Name of an existing EC2 KeyPair to enable SSH access.

Resources:
  MyEC2Instance:
    Type: AWS::EC2::Instance
    Properties:
      InstanceType: !Ref InstanceType
      KeyName: !Ref KeyName
      ImageId: ami-0c02fb55956c7d316 # Example Amazon Linux 2 AMI (update for your region)
      SecurityGroupIds:
        - !Ref InstanceSecurityGroup
      Tags:
        - Key: Name
          Value: MyEC2Instance

  InstanceSecurityGroup:
    Type: AWS::EC2::SecurityGroup
    Properties:
      GroupDescription: Allow SSH and HTTP access.
      SecurityGroupIngress:
        - IpProtocol: tcp
          FromPort: 22
          ToPort: 22
          CidrIp: 0.0.0.0/0 # Allow SSH from anywhere (change for better security)
        - IpProtocol: tcp
          FromPort: 80
          ToPort: 80
          CidrIp: 0.0.0.0/0 # Allow HTTP traffic from anywhere

Outputs:
  InstanceId:
    Description: ID of the created EC2 instance.
    Value: !Ref MyEC2Instance
  PublicIpAddress:
    Description: Public IP address of the created EC2 instance.
    Value: !GetAtt MyEC2Instance.PublicIp
  SecurityGroup:
    Description: Name of the security group used.
    Value: !Ref InstanceSecurityGroup