Imagine a software development company, “XYZ Company.” running multiple development environments on AWS. These environments are used during specific time of the day or a week or regular timeframe (for example 9 PM to 6 AM UTC) but remain idle outside these times, incurring unnecessary costs. By automating the start and stop of these EC2 instances, Tech Innovators can significantly reduce their AWS bill while ensuring resources are available when needed.
In this lab, you will use Amazon EventBridge, a serverless event bus service that enables the creation of event-driven architectures by routing events from various sources to AWS services like Lambda. This allows you to automate tasks and processes, ensuring optimal resource usage and cost management. You will learn how to set up EventBridge to trigger Lambda functions, which will start and stop your EC2 instances on a defined schedule, demonstrating the integration of EC2, Lambda, IAM, and EventBridge for automated instance management.
Prerequisites
This lab assume you have basic understanding and knowledge of Amazon EC2, Lambda Function(Python Programming Language), and EventBridge.
If you find any gaps in your knowledge, consider taking the following lab:
•Creating an Amazon EC2 instance (Linux)
•Creating an AWS Lambda function
Objectives
In this lab, you will:
•Create a Lambda function to start and stop an EC2 instance.
•Learn how to set up EventBridge rules to trigger events based on a schedule.
•Demonstrate the integration of EC2, Lambda, and EventBridge for automated instance management.
Lab Steps
Create an Amazon EC2 Instance
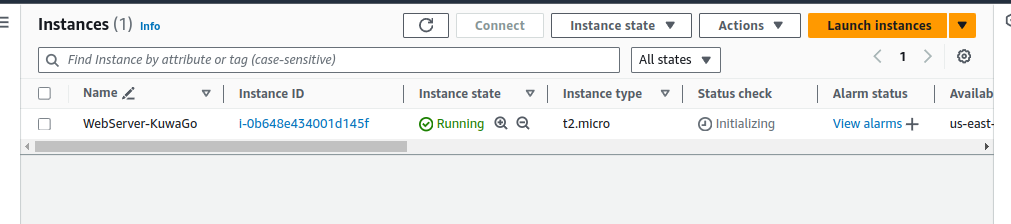
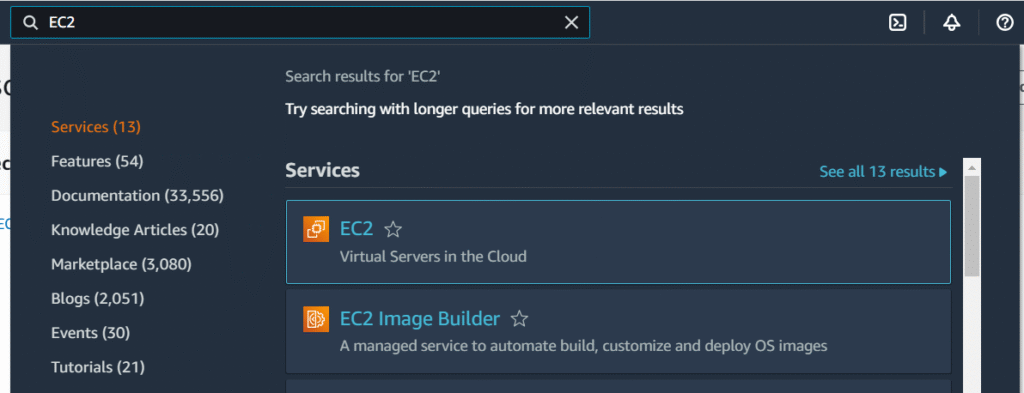
1.Navigate the EC2 Dashboard.
- Launch an EC2 Instances using the following configurations:
•Name: WebServer-KuwaGo
•AMI: Amazon Linux
•Instance type: t2.microKey pair: (Please create a new one.)
oKey pair name: KuwaGo-KeyPair
oKey pair type: RSA
oPrivate key file format: .pem
•Network settings: (Click “Create security group”)
o Auto-assign public IP: Select Enable
o Firewall (security groups): tick on the Create security group
▪ Ensure that Allow SSH traffic from is checked and is My IP
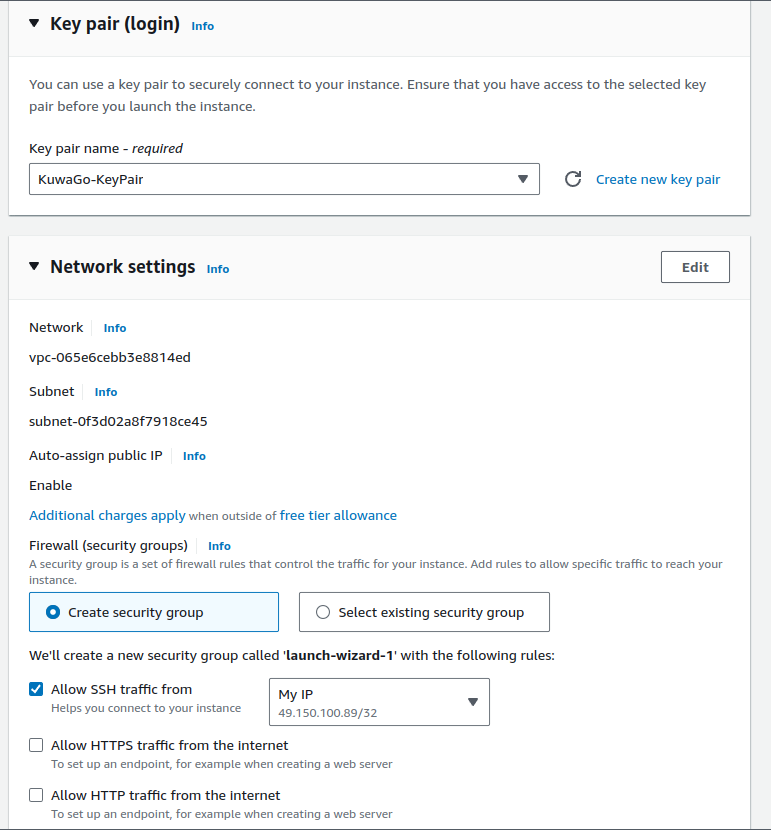
Click Launch Instance.
Create a Lambda Function
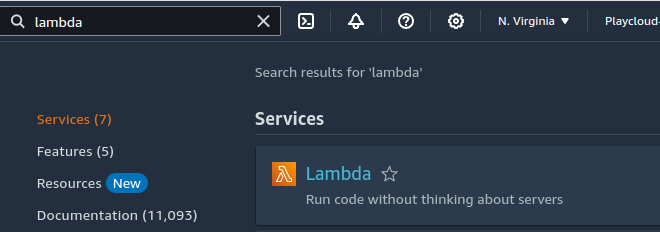
- Navigate to the AWS Lambda Dashboard.
2.Create a Lambda function with the following Configurations:
• Choose Author from scratch.
• Function name: EC2StartStopFunction
• Runtime: Choose Python 3.12 or the latest one
• Permissions: Change default execution role > Execution role: Select “Use an existing role” and choose the role PlayCloud-Sandbox
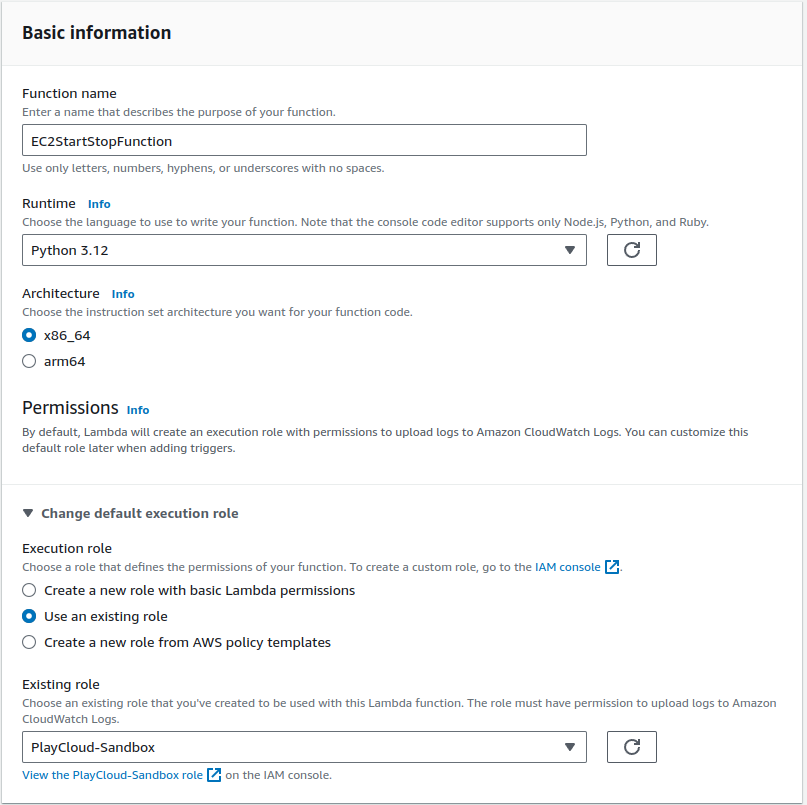
Click Create function.
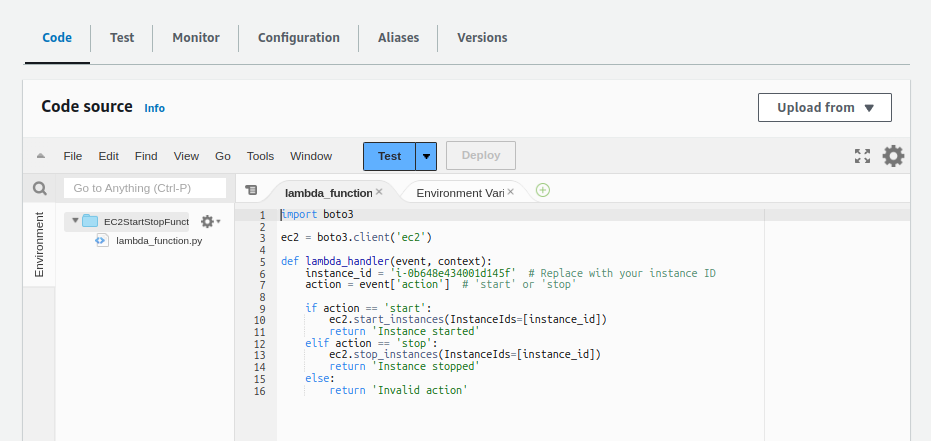
Add the following code to the Lambda function (Python example) Code Editor Tab:
Replace the PLACEHOLDER with your instance ID
ec2 = boto3.client('ec2')
def lambda_handler(event, context):
instance_id = '<EC2-INTANCE-ID>' # Replace with your instance ID
action = event['action'] # 'start' or 'stop'
if action == 'start':
ec2.start_instances(InstanceIds=[instance_id])
return 'Instance started'
elif action == 'stop':
ec2.stop_instances(InstanceIds=[instance_id])
return 'Instance stopped'
else:
return 'Invalid action'
Click Deploy.
Create Amazon EventBridge Rules to Trigger Lambda
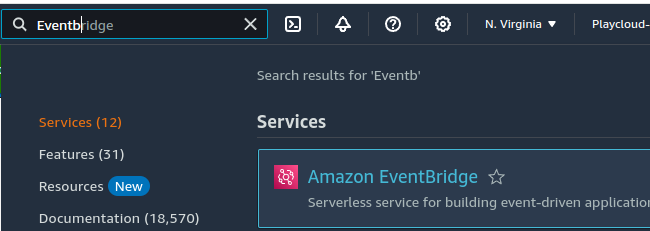
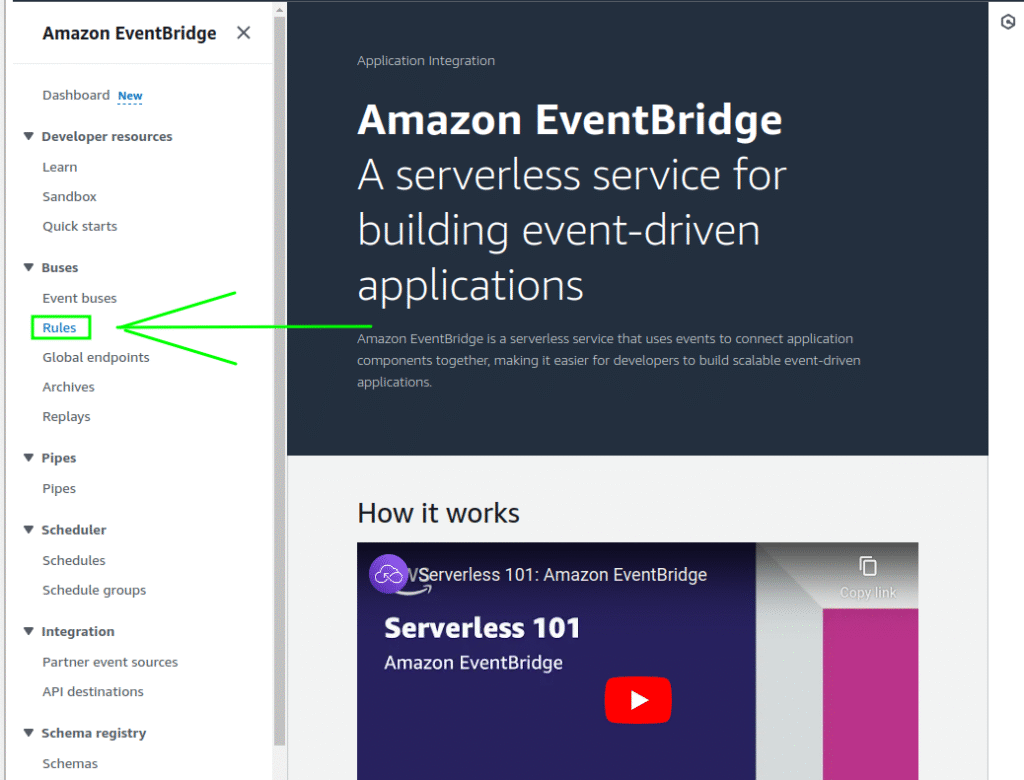
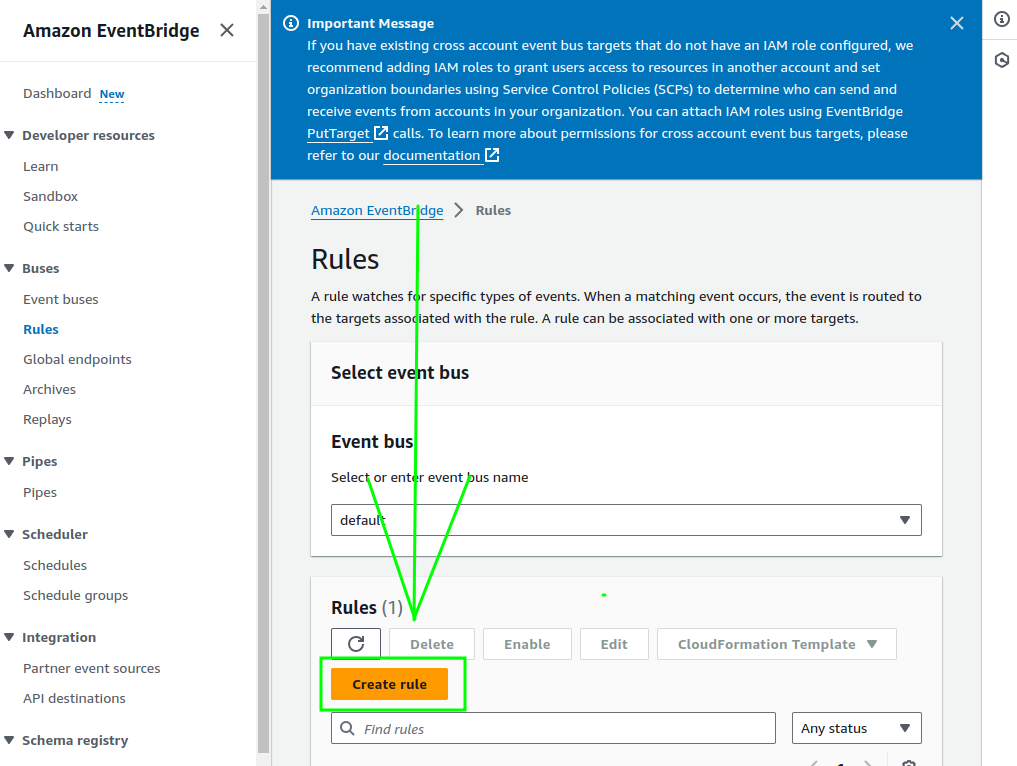
- Navigate to the EventBridge Dashboard.
2. Click on Rules in the left navigation pane.
3. Click Create rule.
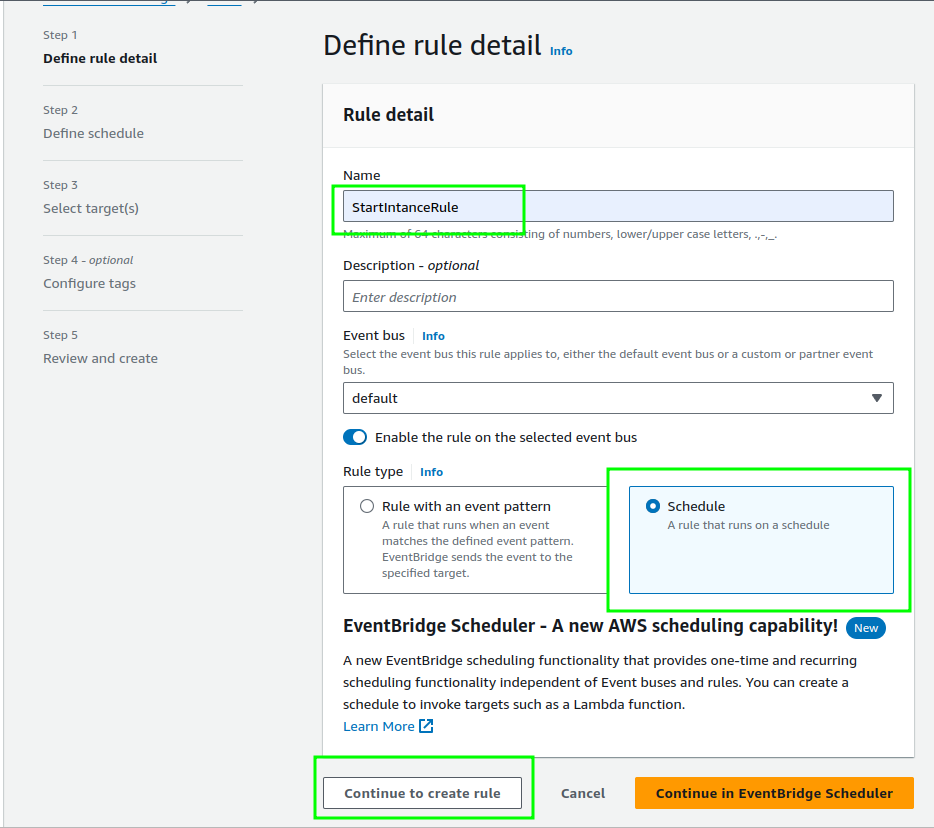
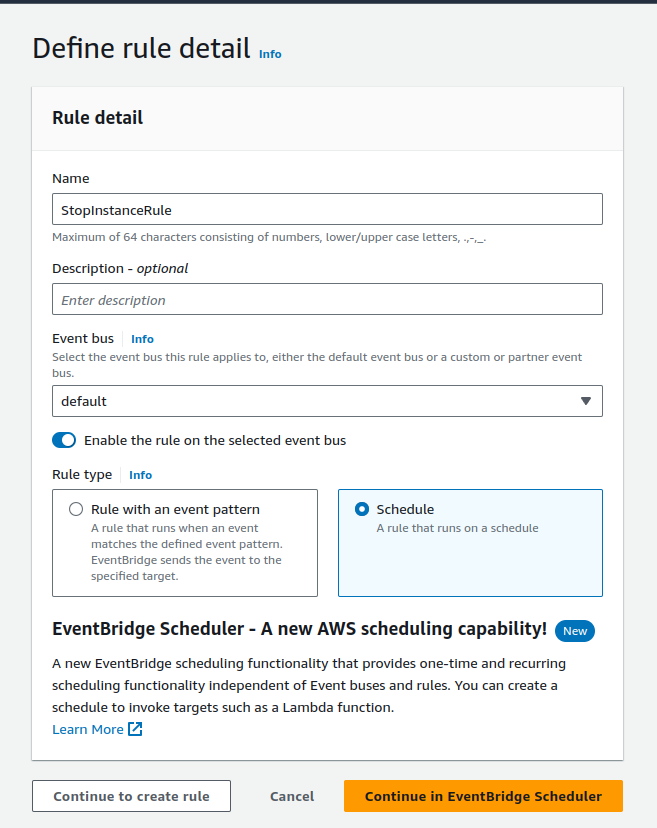
- Configure the following settings to create a Start Rule:
•Name: StartIntanceRule
•Rule type: Select Schedule
•Click on Continue to create rule
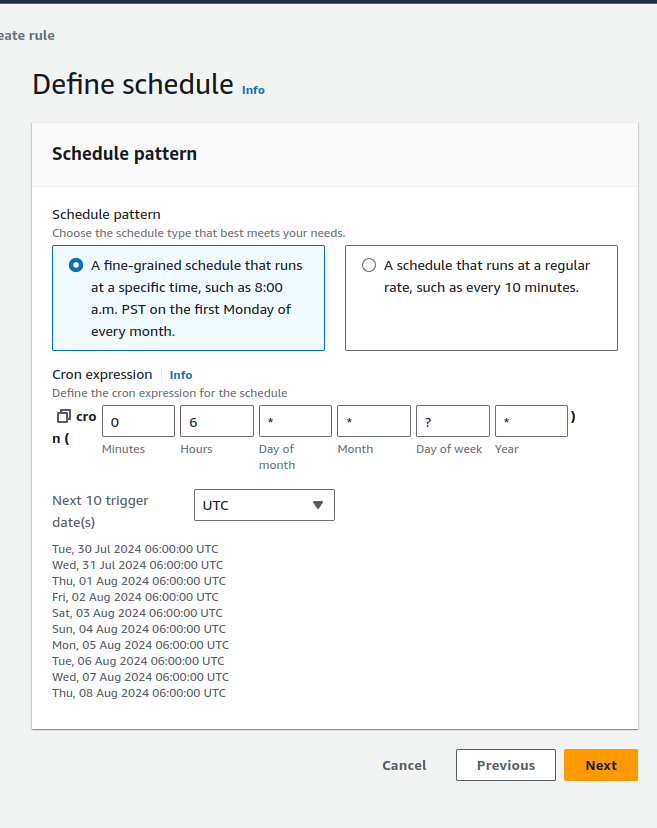
Define schedule Step:
When creating a scheduled rule in EventBridge, you have two options to define how often the rule triggers:
•Rate Expression – Use this for a simple, fixed-rate schedule. Example: Trigger the rule every 5 minutes, every hour, or every week.
•Cron Expression- Use this for a more detailed, customizable schedule. Example: Trigger the rule at 8 AM on the first Monday of each month.
Set the cron expression to stop the instance to a preferred time(e.g., 0 21 * * ? * to stop at 9 PM UTC every day).
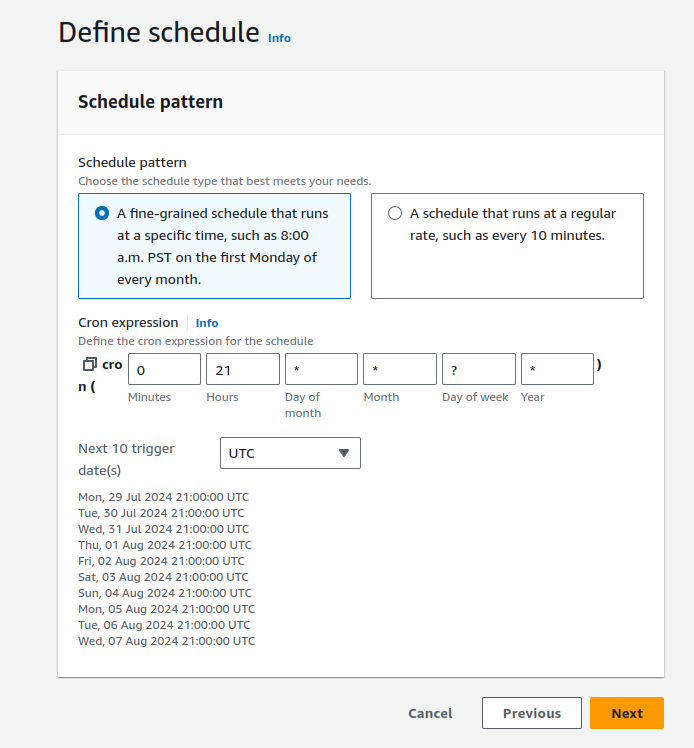
• Take time to review the Next ten trigger dates, then click Next
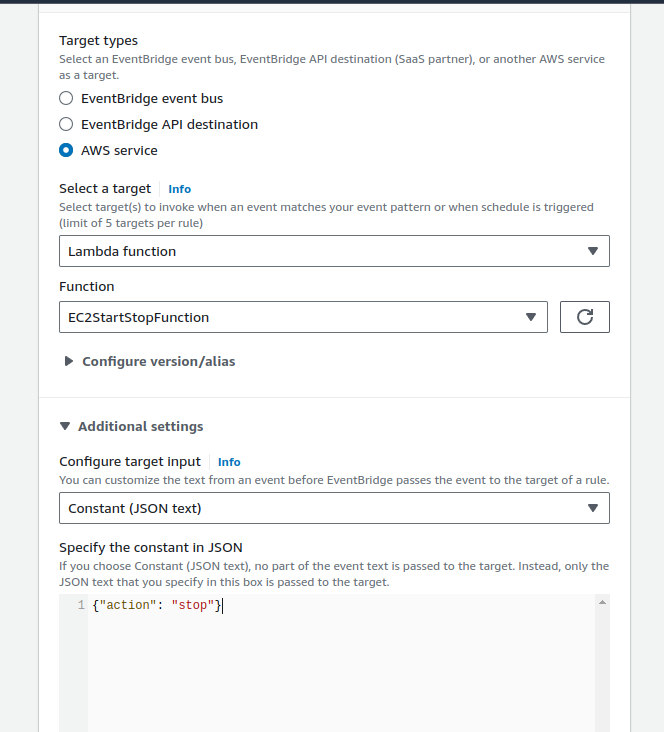
- Under Targets, click Add target.
•Target: Choose Lambda function.
•Function: Select the Lambda function created in EC2StartStopFunction
•Additional settings: Select Constant (JSON text) and enter {“action”: “start”}.
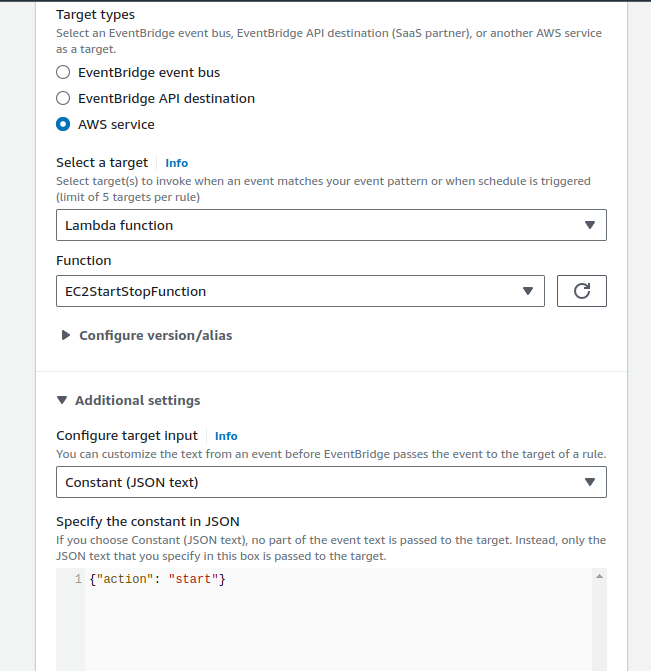
• Scroll down and Click Next, Click Next until you get to the Review and create section
• Click Create rule
- Repeat steps 4-6 to create a Stop Rule:
• Name: StartIntanceRule
• Rule type: Select Schedule
• Click on Continue to create rule
• Schedule: Set the cron expression to stop the instance (e.g., 0 6 * * ? * to stop at 6 AM UTC every day).
• Click Next
• Same Target: Choose Lambda function.
• Same Function: Select the Lambda function created in EC2StartStopFunction
• Additional settings: Select Constant (JSON text) and enter {“action”: “stop”}.
• Click Next until Step 5 to review. Then, Click Create rule
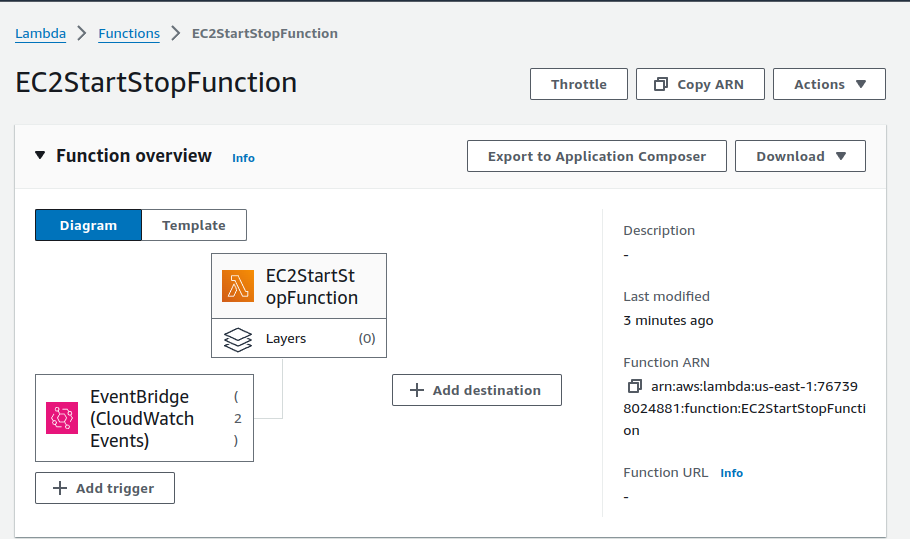
Test the Setup
To simulate the scheduled rule trigger of the EventBridge, we will use the Test Event Feature of our Lambda function.
- Navigate to the Lambda Dashboard and verify the triggers of your Lambda.
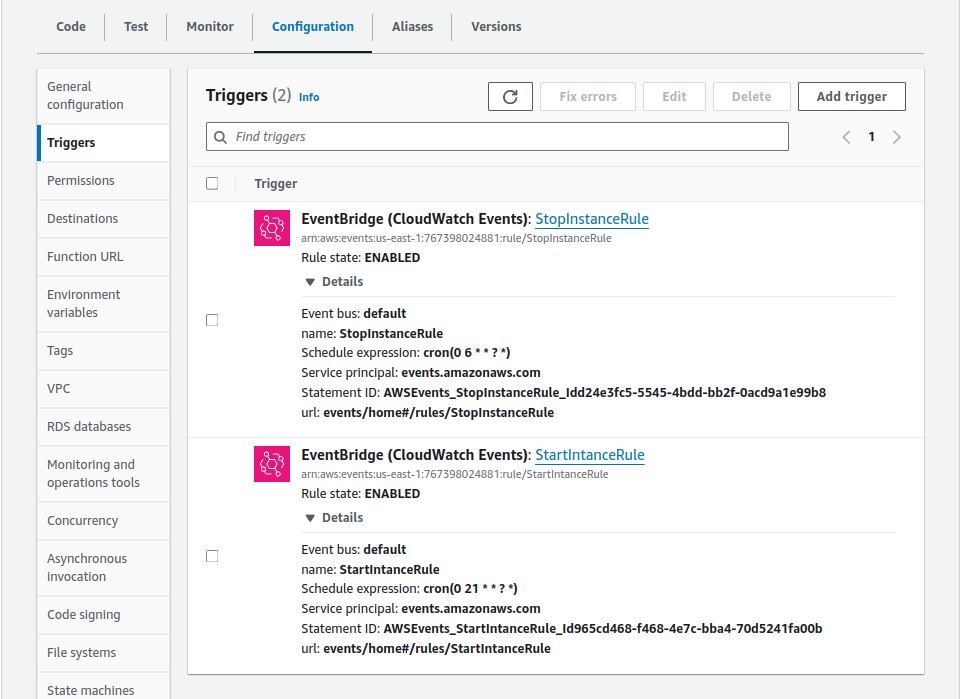
- Trigger the Lambda by Adding this Test Event:
• Event name: stopTrigger-Test
• Event JSON: {“action”: “stop”}
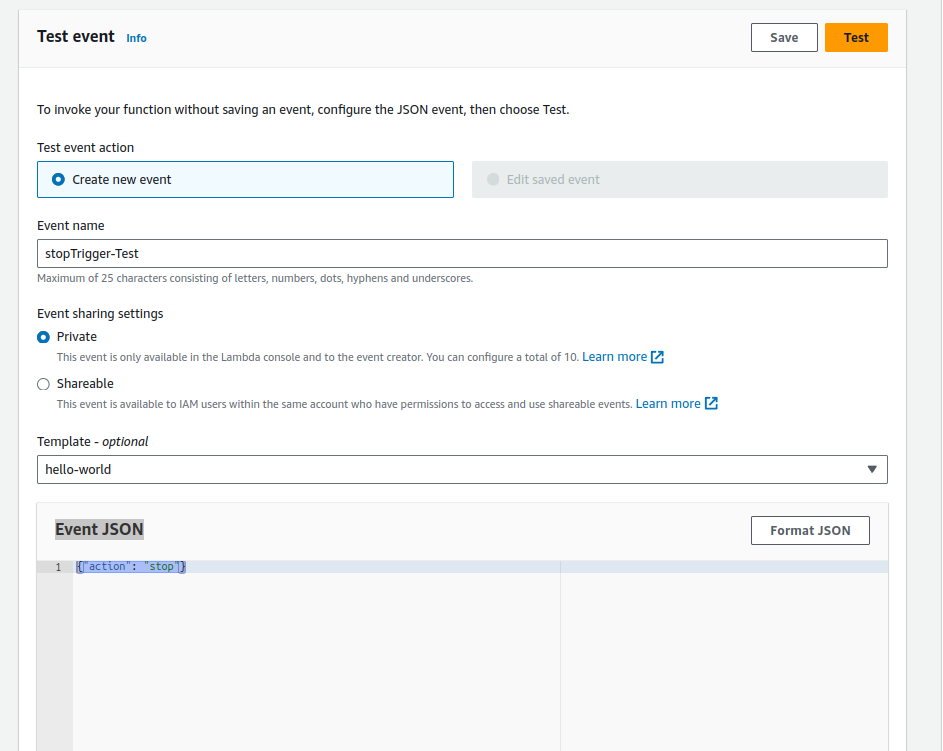
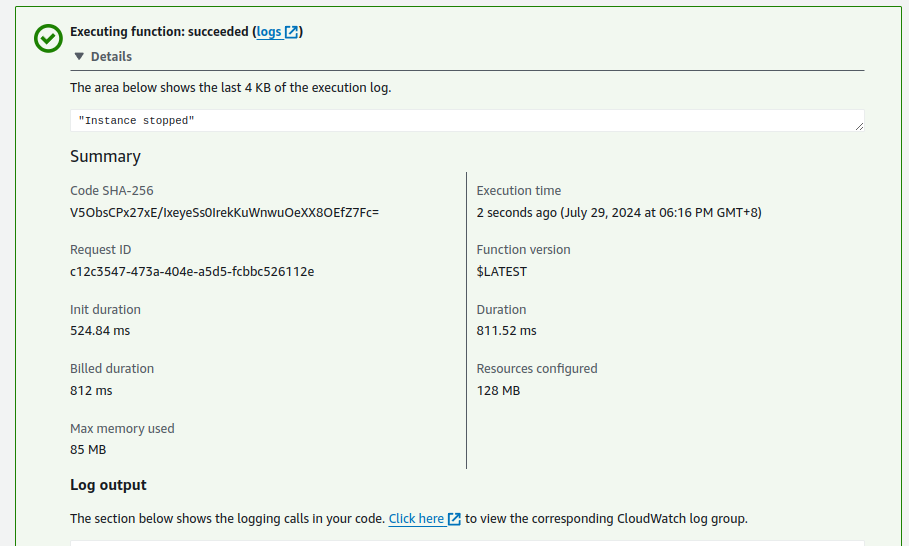
• Save it Click Test
• Navigate to your instance again to check if the instance started running. Refresh it if necessary.