Create and Manage Amazon Machine Images (AMIs)
Step 1: Sign in to the AWS Management Console and open the Amazon EC2
console at https://us-east-1.console.aws.amazon.com/ec2/.
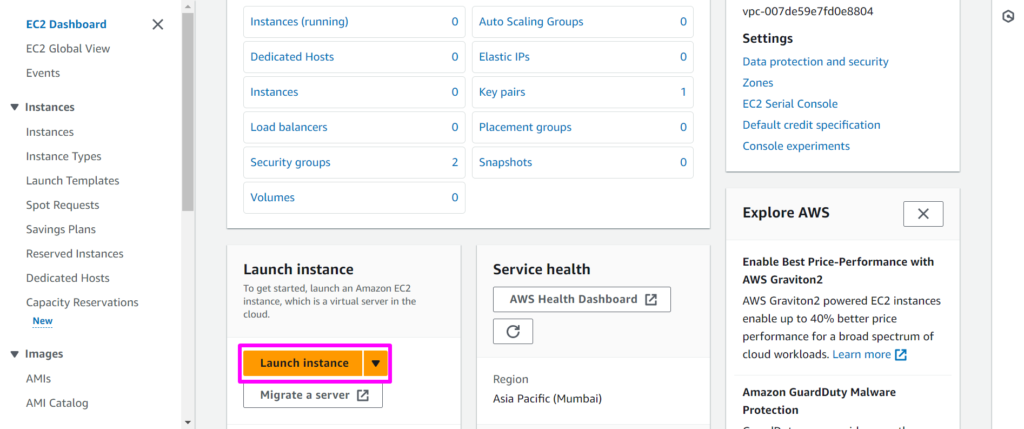
Step 2: Access the EC2 Dashboard and select Launch instance.
Step 3: Provide a Name for your EC2 instance.

Step 4: Select Amazon Linux operating system.

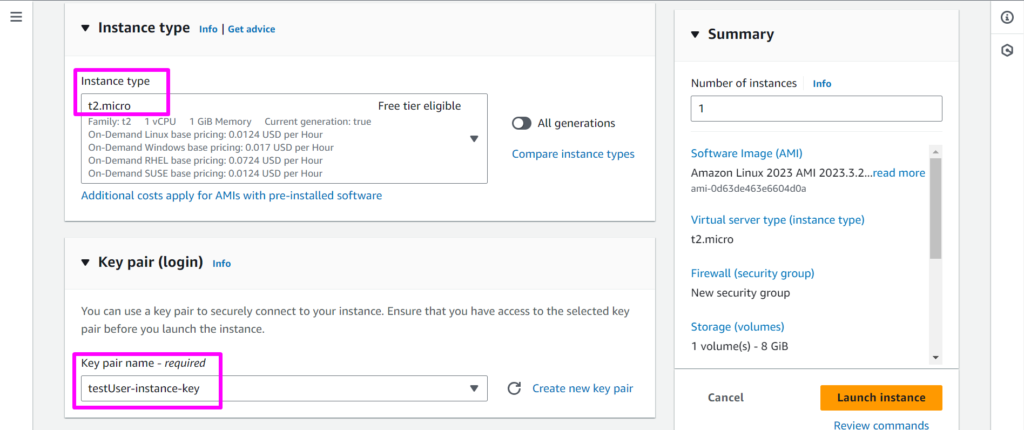
Step 5: Choose an Instance type, and select a Key pair.
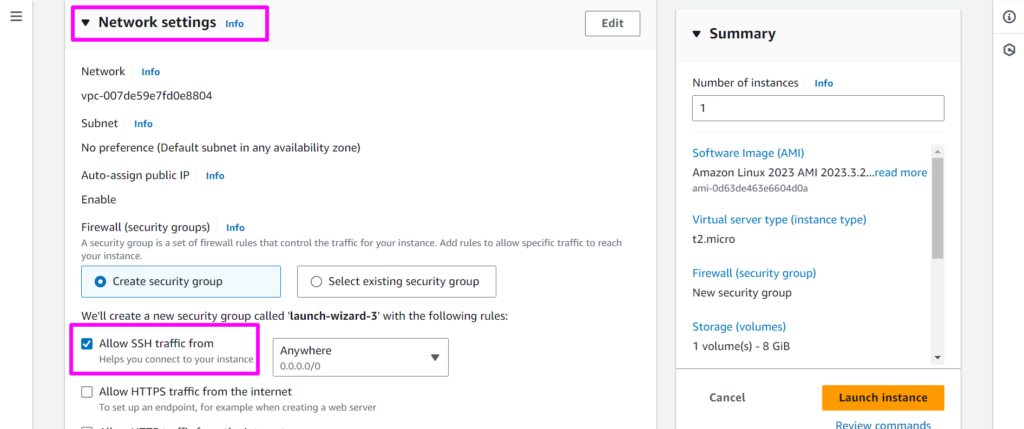
Step 6: Navigate to Network settings, Allow SSH traffic in the firewall settings,
scroll to the bottom to review disk configurations, and then click on Launch
instance.
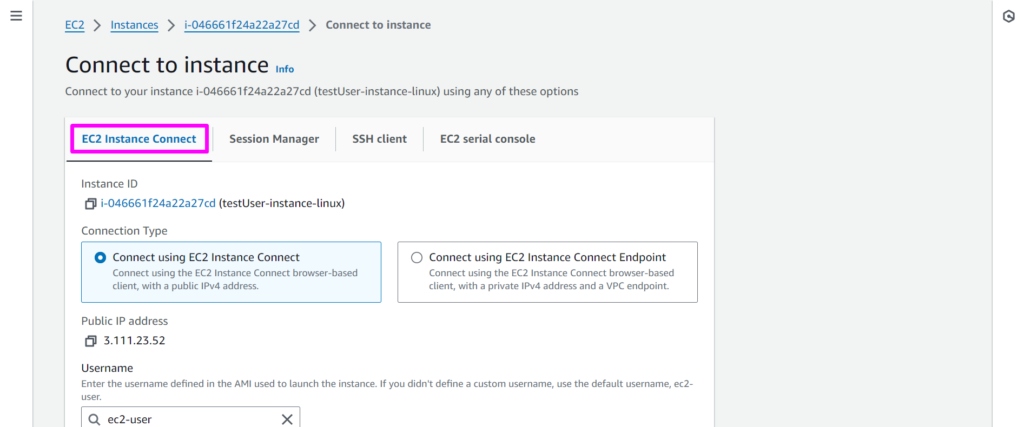
Step 7: Wait for your instance to reach the Running state. Once ready, select
your Instance, Connect to connect to the instance.
Step 8: Install Apache2 in the instance to make sure the same is installed in the
instances created by AMI afterward using the below commands:
$ sudo apt-get update
$ sudo apt install apache2 -y
$sudo service apache2 enable
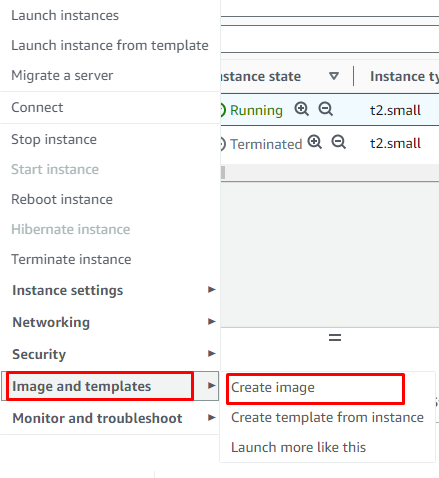
Step 9: Right-click the instance you want to use as the basis for your AMI and
choose Create Image from the context menu
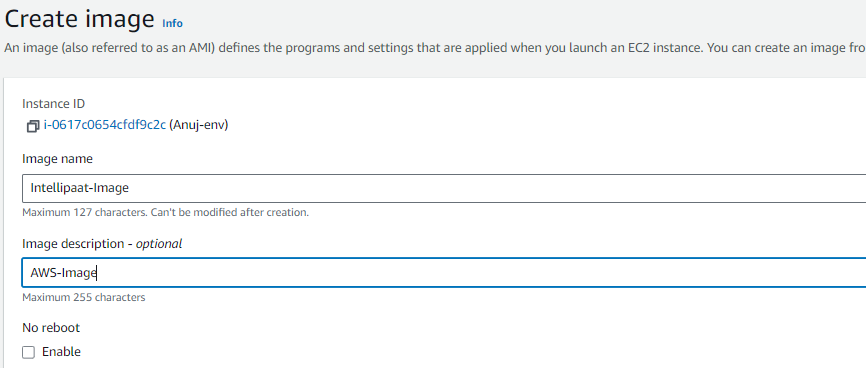
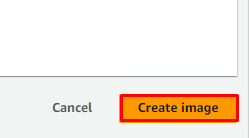
Step10: In the Create image dialog box, type a unique name and description,
and then click Create image.
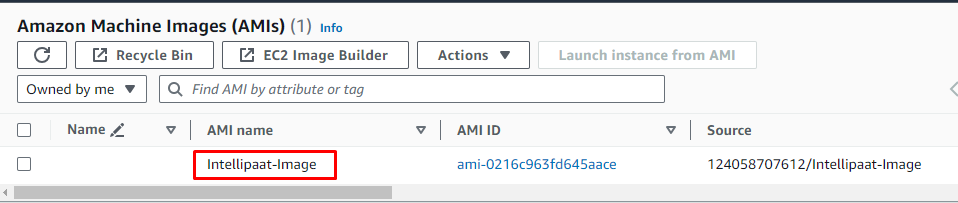
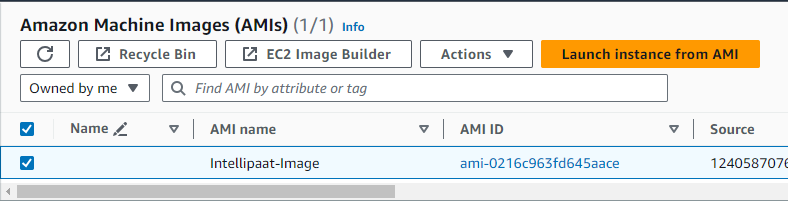
Step 11: Choose AMI from the left navigation pane, your Image will be visible
under AMIs.
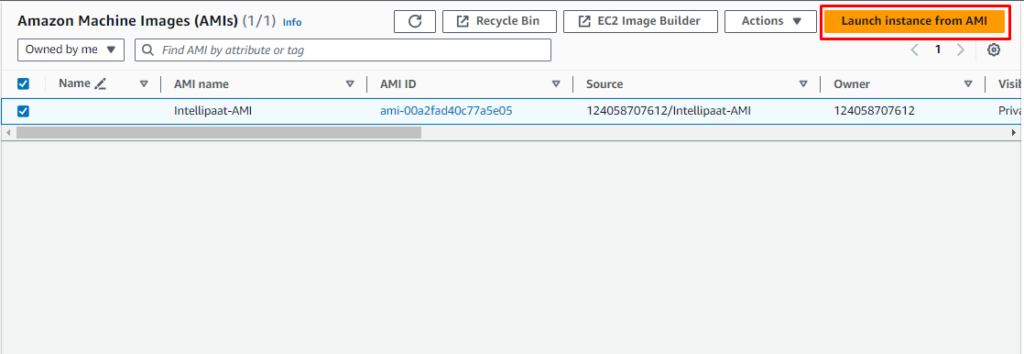
Step 12: Launch a new instance using this AMI.
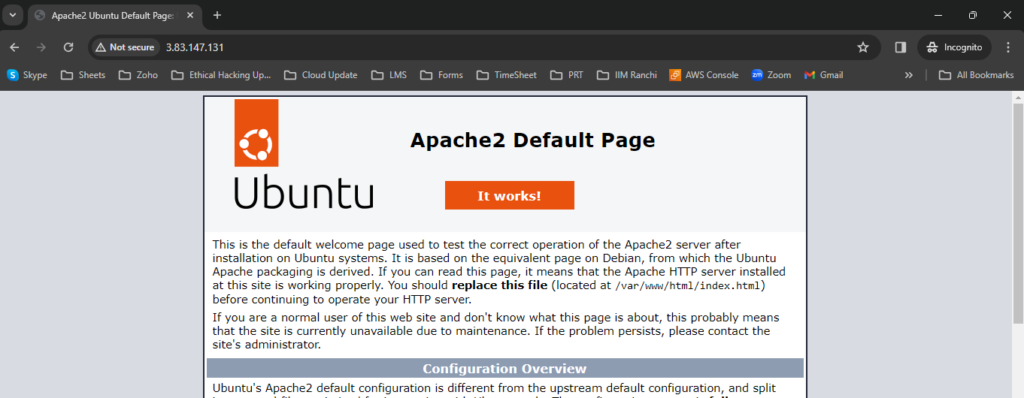
Step 13: Copy the Public IP of the instance, paste it to the browser, and verify
that the Apache service is already running.
To clean up your Amazon EBS-backed AMI
Step 14: Choose AMI from the left navigation pane, and select your image to be
deregistered.
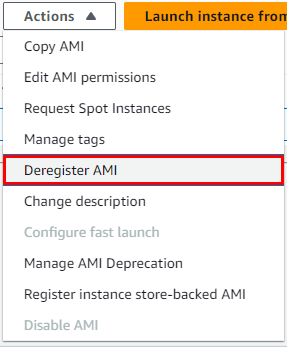
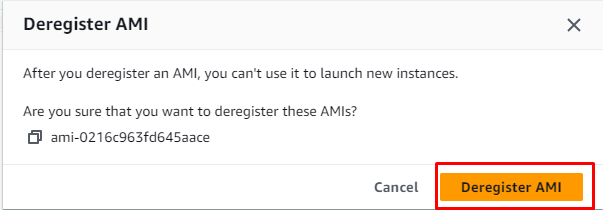
Step 15: Choose Actions, Deregister AMI. When prompted for confirmation,
choose Deregister AMI.